

 By
Hardwood flooring can transform your home with its natural beauty, warmth, and timeless appeal. Whether you’re upgrading an outdated living room or installing new floors throughout your house, understanding the installation process can help you prepare for a smoother experience.
Professional hardwood floor installation involves much more than placing wooden planks on the floor. From evaluating the subfloor to selecting the right materials and applying the finishing touches, every step contributes to the final appearance and performance of your flooring.
If you’re considering hardwood flooring in Boise, here’s what you can expect when working with experienced flooring professionals.
1. Initial Consultation and Flooring Selection
Every successful flooring project begins with understanding your needs, preferences, and budget. During the initial consultation, a flooring professional will evaluate your space and discuss the look you want to achieve.
You’ll typically explore different hardwood species, plank widths, colors, textures, and finishes. Popular options include oak, maple, hickory, and walnut, each offering distinctive grain patterns and visual characteristics.
You’ll also need to decide between solid and engineered hardwood. Solid hardwood consists of a single piece of wood, while engineered hardwood features a real wood surface attached to a layered core. Depending on the product and installation requirements, either option may be suitable for your home.
Your installer can explain the advantages of each material and help you select flooring that complements your interior.
2. Measuring the Space and Preparing an Estimate
Once you’ve selected your preferred flooring, the next step is measuring the installation area. Accurate measurements help determine the quantity of materials required and provide a clearer understanding of the project’s scope.
Your contractor may also assess doorways, transitions between rooms, stairs, and existing flooring conditions.
The estimate should outline the expected costs for materials, labor, subfloor preparation, removal of old flooring, and additional work where applicable.
Before moving forward, clarify the project timeline, payment schedule, warranty coverage, and any responsibilities you have as the homeowner.
A detailed estimate helps prevent misunderstandings and makes it easier to plan your renovation.
3. Subfloor Inspection and Preparation
Proper preparation is essential for a durable hardwood floor. Even high-quality materials can develop problems if installed over an unsuitable surface.
Before installation, professionals inspect the subfloor for uneven areas, moisture concerns, loose sections, and signs of damage. Any necessary repairs or leveling work should be completed before the new flooring is installed.
Moisture testing is particularly important because excessive moisture can contribute to wood movement, warping, or gaps.
In Boise, seasonal temperature changes and indoor humidity levels make it important to follow the flooring manufacturer’s recommendations for moisture control and installation conditions.
Your installer will also determine whether the selected hardwood requires an underlayment, vapor retarder, or another preparation method based on the product and subfloor.
4. Acclimating the Hardwood Flooring
Depending on the flooring product and manufacturer, the wood may need time to adjust to the conditions inside your home before installation.
This process is commonly called acclimation. However, not every hardwood product requires the same procedure, so your installer should follow the manufacturer’s specific instructions rather than relying on a fixed number of days.
Indoor temperature, relative humidity, moisture measurements, and the flooring’s construction can all influence the preparation requirements.
Allowing the material to meet the specified installation conditions helps reduce the risk of excessive expansion, contraction, and related flooring problems.
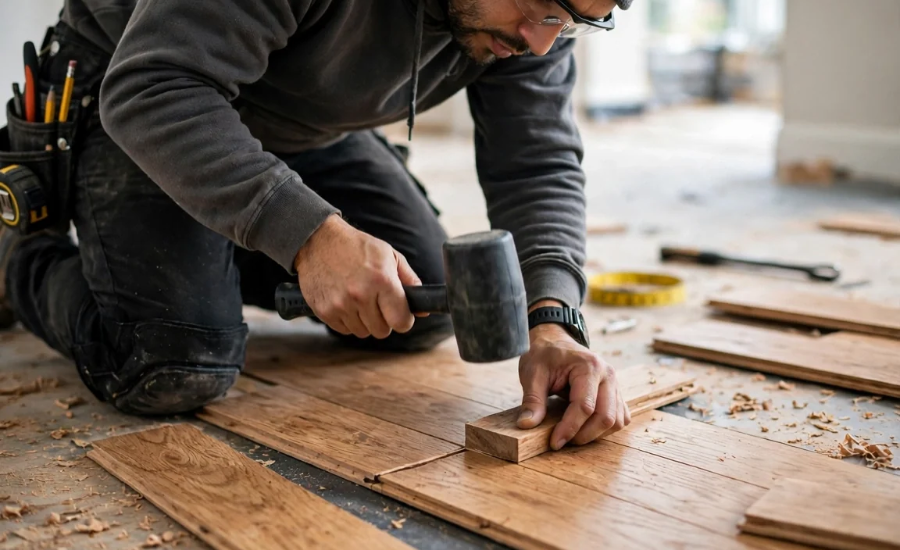
5. Professional Hardwood Floor Installation
Once the subfloor and materials are ready, the installation work can begin.
The exact process depends on whether you’re installing solid hardwood, engineered hardwood, or a floating-floor product.
A typical installation may include:
1. Planning the layout: Installers determine plank direction, starting points, and board placement for a balanced appearance.
2. Establishing reference lines: Measurements help keep the rows straight and maintain consistent spacing.
3. Installing the boards: Depending on the product, planks may be nailed, stapled, glued, or installed using an approved floating method.
4. Managing expansion requirements: Installers leave the clearances specified by the manufacturer to accommodate natural wood movement.
5. Completing transitions: Doorways, adjoining flooring, and other edges receive appropriate transition pieces or trim.
Professional workmanship helps create a consistent appearance while reducing installation-related problems.
6. Finishing Touches and Final Inspection
After the flooring is installed, the finishing work helps bring the entire project together.
Depending on the flooring system, this stage may involve installing baseboards or shoe molding, fitting transitions, and completing any required finishing work. Some prefinished hardwood products arrive with their final protective coating already applied, while unfinished flooring requires sanding and finishing after installation.
Your contractor should inspect the completed floor for visible defects, loose boards, uneven transitions, and other installation concerns.
Before considering the project complete, ask about cleaning recommendations, furniture placement, area rugs, and any restrictions during the finish’s drying or curing period.
Following these instructions helps protect your new flooring during its early days of use.
7. How Long Does Hardwood Floor Installation Take?
The timeline depends on the size of the project, the type of flooring, subfloor conditions, and the amount of preparation required.
A straightforward installation in one or two rooms may take a few days, while larger projects or those involving extensive repairs can take longer. Acclimation requirements, custom layouts, and on-site finishing can also affect the schedule.
Your flooring contractor should provide a realistic timeline and explain when each room will be available for normal use.
Planning ahead can help you coordinate furniture removal, household activities, and any other renovation work.
Choose Professional Hardwood Flooring in Boise
Installing hardwood flooring is a valuable investment in your home’s appearance and functionality. With careful preparation, suitable materials, and experienced workmanship, you can enjoy beautiful floors designed to perform well for years.
If you’re considering hardwood flooring in Boise, work with professionals who understand subfloor preparation, moisture management, product specifications, and installation techniques.
The best results start with the right preparation and expert installation. A qualified flooring team can guide you through every stage, helping you make informed decisions and achieve a finished floor that complements your home.